Introduction 00:00
In one of the previous lessons, we created a hamburger (although I realised it should have been named “cheeseburger”) and learned how to implement it in Three.js.
We are going to do the same with R3F and discover some tips and tricks along the way.
Setup 00:33
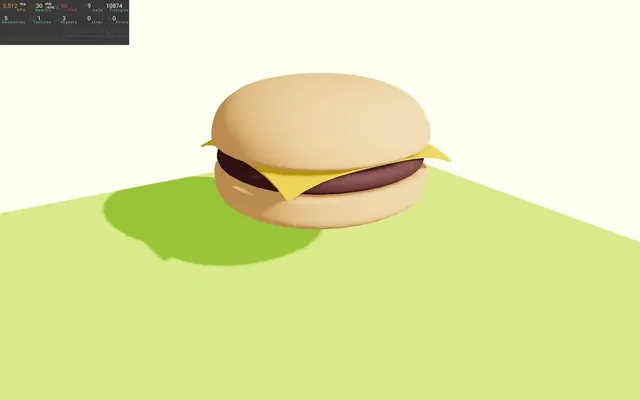
The starter is similar to the previous lesson with a sphere, a cube and a green floor.
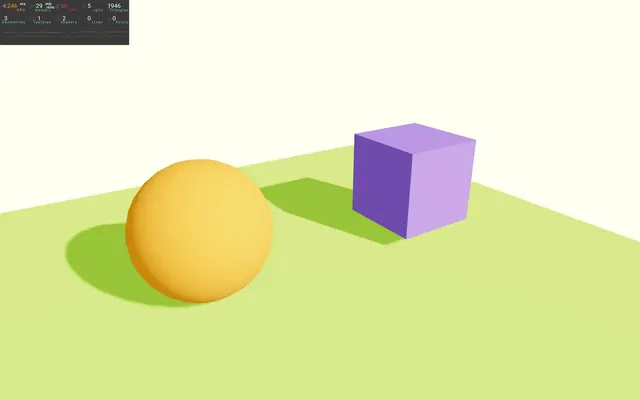
We’ve also added <Perf /> from r3f-perf in order to keep an eye on performance.
We activated the shadows on the <Canvas> and added castShadow and receiveShadow on the corresponding <mesh> and <directionalLight>.
The @react-three/drei dependency is already installed within the project and we are using the OrbitControls helper to be able to move the camera around.
Clean up
In Experience.jsx, we can start by removing the sphere <mesh> and the cube <mesh> that were there just to make sure that the shadows function:
export default function Experience()
{
    return <>

        <Perf position="top-left" />

        <OrbitControls makeDefault />

        <directionalLight castShadow position={ [ 1, 2, 3 ] } intensity={ 4.5 } />
        <ambientLight intensity={ 1.5 } />

        <mesh receiveShadow position-y={ - 1 } rotation-x={ - Math.PI * 0.5 } scale={ 10 }>
            <planeGeometry />
            <meshStandardMaterial color="greenyellow" />
        </mesh>

    </>
}

Loading a model 01:37
We have a bunch of models available in the /public/ folder and we are going to focus on the two hamburger files for now.
One is DRACO compressed (hamburger-draco.glb) and the other is not (hamburger.glb).
In the following part, we are only going to discuss GLTF loading since it’s the standard and the most frequently used format, but the solutions we are going to see can be used with other formats.
R3F provides a hook named useLoader that abstract loading.
In Experience.jsx, import useLoader from @react-three/fiber:
import { useLoader } from '@react-three/fiber'To use it, we need to send it the Three.js loader class we want to use and the path to the file.
Because it’s a GLTF, we need to import GLTFLoader from three:
import { GLTFLoader } from 'three/examples/jsm/loaders/GLTFLoader.js'In Experience, we can now call useLoader:
export default function Experience()
{
    const model = useLoader(GLTFLoader, './hamburger.glb')
    console.log(model)

    // ...
}
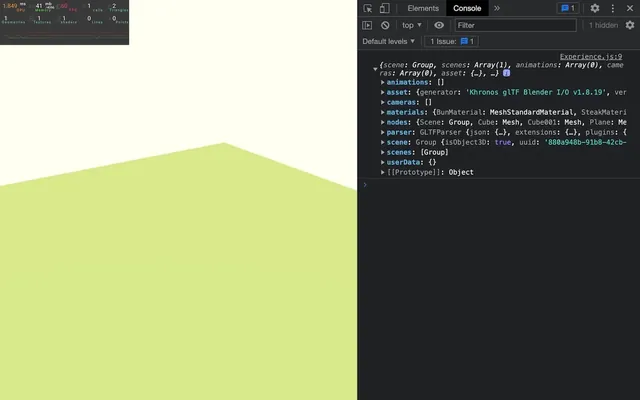
Note that we started the path to the file with ./ which should work in most cases. './hamburger.glb' will look for the file named hamburger.glb in the same folder and since the files located in the /public/ folder are made available like if they are at the root of the website, the model will load. Still, when putting your experience online, you might have to do some tweaks according to your website, the path to access it, specific folders structure and rewriting rules.
Back to our project, you should see an object containing our model in the console.
To display it in our scene, we need to add model.scene somewhere in the JSX. Unfortunately, we can’t just write it like this:
{ model.scene }Or like this:
<model.scene />These commands are not supported by R3F and they don’t really make sense.
What we need is <primitive>.
<primitive> is some kind of holder for whatever we want to put in it.
It’s not a real object that we will be able to see in the scene, but it’s a container supported by R3F that will handle and display whatever we put in its object attribute.
Add a <primitive> with the model.scene as the object attribute:
export default function Experience()
{
    const model = useLoader(GLTFLoader, './hamburger.glb')

    return <>

        {/* ... */}

        <primitive object={ model.scene } />

    </>
}

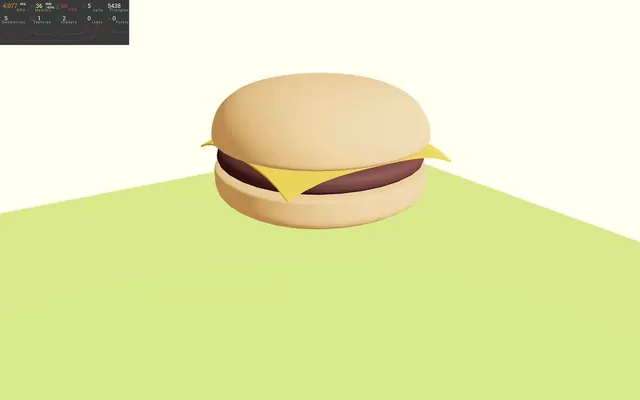
A giant hamburger! My favorite type of hamburger.
It’s obviously too big and we can reduce its size with the scale attribute:
<primitive object={ model.scene } scale={ 0.35 } />

Remember that sending one value to the scale attribute will apply it to all 3 axes.
You might have noticed that the shadows are missing. We are going to fix that later in the lesson.
DRACO 09:59
But what about a DRACO compressed model?
If we try to load it, we get an error:
const model = useLoader(GLTFLoader, './hamburger-draco.glb')
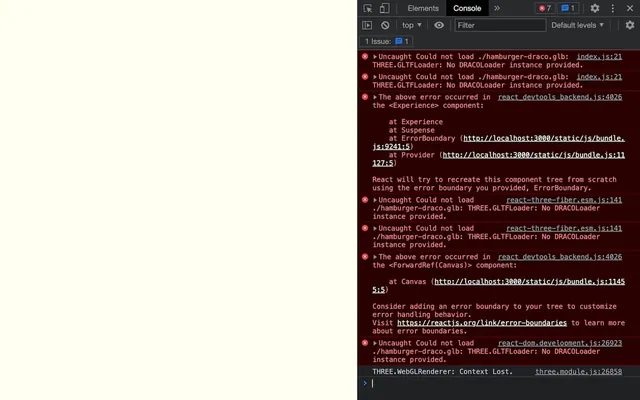
As we discussed in previous lessons, we need to instantiate a DRACOLoader class and add it to the GLTFLoader instance with setDRACOLoader().
To do that, we can pass a third argument to the useLoader() and send it a function that will give us access to the loader instance:
const model = useLoader(
    GLTFLoader,
    './hamburger-draco.glb',
    (loader) =>
    {
        console.log(loader)
    }
)
Here, we can associate a DRACOLoader instance, but first, we need to import it from three:
import { DRACOLoader } from 'three/examples/jsm/loaders/DRACOLoader.js'We can then instantiate it in the function (the DRACO decoder folder is available in the /public/ folder) and associate it with the GLTFLoader instance using setDRACOLoader():
const model = useLoader(
    GLTFLoader,
    './hamburger-draco.glb',
    (loader) =>
    {
        const dracoLoader = new DRACOLoader()
        dracoLoader.setDecoderPath('./draco/')
        loader.setDRACOLoader(dracoLoader)
    }
)

And our hamburger is back, but DRACO compressed.
Lazy loading 14:18
You can’t notice it because the hamburger model is quite light and we are running the server locally, but currently, R3F is holding the rendering of the Experience as long as everything isn’t ready in our scene. That also includes the loading of the model.
Loading a bigger model
To see that more clearly, we can switch to the Flight Helmet that we used in the Realistic Render lesson.
Change the path of the file to './FlightHelmet/glTF/FlightHelmet.gltf':
const model = useLoader(
    GLTFLoader,
    './FlightHelmet/glTF/FlightHelmet.gltf',
    (loader) =>
    {
        const dracoLoader = new DRACOLoader()
        dracoLoader.setDecoderPath('./draco/')
        loader.setDRACOLoader(dracoLoader)
    }
)
The model is too small and a bit too high. Fix it with scale and position-y on the <primitive>:
<primitive object={ model.scene } scale={ 5 } position-y={ - 1 } />

Network throttling
We can now activate the Network throttling to simulate a real-life experience with a model that takes time to load.
The following instructions assume that you are using Chrome, but most modern browsers have very similar features and you should be able to handle it yourself.
Open your Developer Tools and go into the Network tab. Here, you’ll be able to activate the throttling.
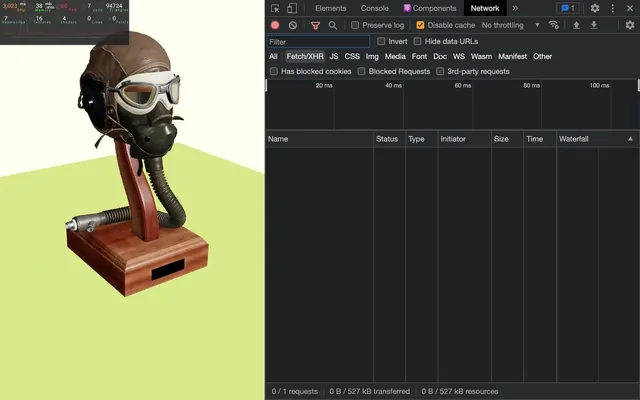
Be careful, the default values aren’t always adapted and you might want to add a custom connection speed (100Mbit/s in download works well in our case).
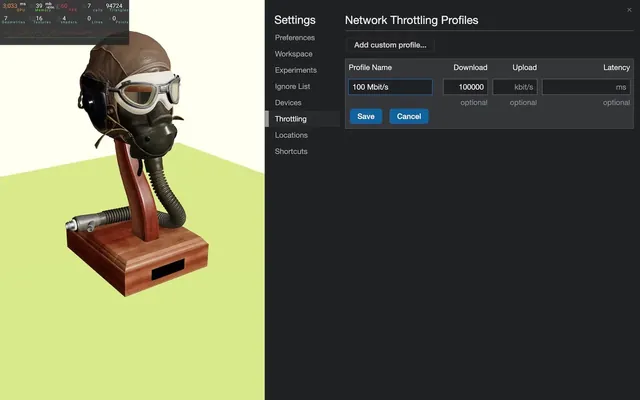
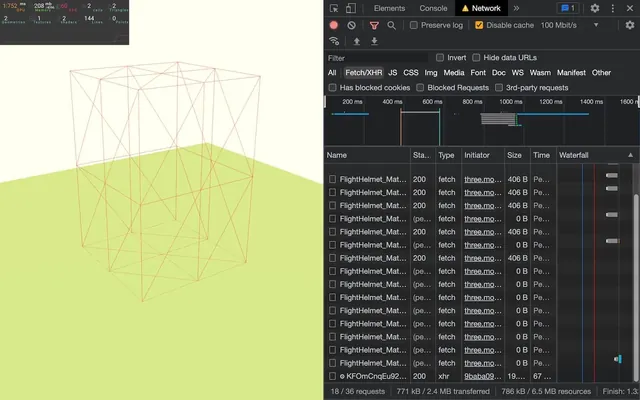
Reloading with this throttling should end up with a white page for a few seconds before seeing the scene.

If setting that throttling isn’t convenient for you, you can skip this step and follow along. The model is so heavy (even in local) that we can notice a delay anyway.
Also, remember that you need to keep your Developer Tools open if you want the network throttling to work.
This delay is bad because the user won’t be able to see anything for a while.
Instead, we would like the scene to be visible with the floor (or whatever we already have inside) and once the model is loaded and ready, it should appear.
We call this “lazy loading”.
Suspense
To implement a lazy loading, we can use the <Suspense> tag.
<Suspense> is a React component that will wait for the process to be done (loading the model in our case) before rendering the component.
Unfortunately, we have only one component in our application and it’s Experience.
Waiting for the model to load before rendering Experience would produce the same result.
We need to put our model in a separated component.
Create a /src/Model.jsx file and export a Model function by default:
export default function Model()
{
    return null
}
In Experience.jsx, import Model:
import Model from './Model.jsx'Add <Model> to the JSX near the <primitive>:
<primitive object={ model.scene } scale={ 5 } position-y={ - 1 } />
<Model />
Now, we need to move the code related to the model from the Experience to the Model.
Move the useLoader, GLTFLoader and DRACOLoader imports:
import { useLoader } from '@react-three/fiber'
import { GLTFLoader } from 'three/examples/jsm/loaders/GLTFLoader.js'
import { DRACOLoader } from 'three/examples/jsm/loaders/DRACOLoader.js'
Move useLoader():
export default function Model()
{
    const model = useLoader(
        GLTFLoader,
        './FlightHelmet/glTF/FlightHelmet.gltf',
        (loader) =>
        {
            const dracoLoader = new DRACOLoader()
            dracoLoader.setDecoderPath('./draco/')
            loader.setDRACOLoader(dracoLoader)
        }
    )

    return null
}
Now move the <primitive>:
export default function Model()
{
    // ...

    return <primitive object={ model.scene } scale={ 5 } position-y={ - 1 } />
}

We should get the exact same result, but now our model and its loading are inside a component.
We can finally add the <Suspense>.
In Experience.jsx, import Suspense from react:
import { Suspense } from 'react'Wrap the <Model> in <Suspense>:
<Suspense>
    <Model />
</Suspense>
Reload the page and you’ll see that the floor appears first, we can interact with the scene and, later, the model appears.
Lazy loading using <Suspense> is a bit tricky because we need to create components, but it’s actually a common practice to separate everything into small components in React. It makes our code more maintainable and more reusable.
Fallback
One cool feature with the <Supense> is that we can set a fallback.
The fallback is what the user will see if the component is not ready (in our case, while the model is loading).
To define the fallback, we can use the fallback attribute:
<Suspense
    fallback={  }
>
In there, we can put anything we want to make sure that the user can see something while it’s loading.
We can set a <mesh>:
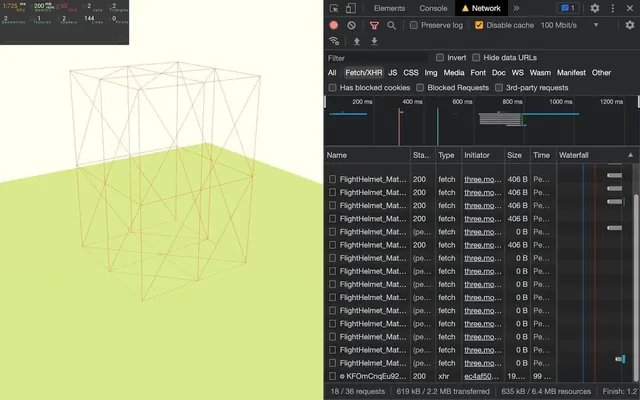
<Suspense
    fallback={ <mesh position-y={ 0.5 } scale={ [ 2, 3, 2 ] }><boxGeometry args={ [ 1, 1, 1, 2, 2, 2 ] } /><meshBasicMaterial wireframe color="red" /></mesh> }
>
If you reload, you’ll see the wireframe box for a brief moment.
But writing components inside an attribute isn’t very convenient.
As a first solution, we could have written it in multiple lines:
<Suspense
    fallback={
        <mesh position-y={ 0.5 } scale={ [ 2, 3, 2 ] }>
            <boxGeometry args={ [ 1, 1, 1, 2, 2, 2 ] } />
            <meshBasicMaterial wireframe color="red" />
        </mesh>
    }
>
    <Model />
</Suspense>
It’s already better, but let’s go even further and create a component.
In /src/ create a Placeholder.jsx file that exports a function by default:
export default function Placeholder()
{
}
In there, we can return the same <mesh> we put in the fallback attribute:
export default function Placeholder()
{
    return <mesh position-y={ 0.5 } scale={ [ 2, 3, 2 ] }>
        <boxGeometry args={ [ 1, 1, 1, 2, 2, 2 ] } />
        <meshBasicMaterial wireframe color="red" />
    </mesh>
}
In Experience.jsx, import the Placholder:
import Placeholder from './Placeholder.jsx'And use it in the fallback attribute:
<Suspense fallback={ <Placeholder /> }>
Currently, we set the position and scale according to the helmet model. But what if we have different models in our projects with various sizes and positions?
A good solution would be to let the developer set attributes on the <Placeholder> and forward them to the <mesh>.
In Placeholder, retrieve the props parameter and apply them all to the <mesh> with the spread operator (...):
export default function Placeholder(props)
{
    return <mesh { ...props } >
        {/* ... */}
    </mesh>
}
And now, we can set attributes on the <Placeholder> if needed:
<Suspense fallback={ <Placeholder position-y={ 0.5 } scale={ [ 2, 3, 2 ] } /> }>
And the cool part is that we can use our Placeholder anywhere we want.
Before continuing, let’s get back to our hamburger and disable the Network Throttling.
In Model.jsx, change the path back to './hamburger.glb', remove the position-y attribute and set the scale to 0.35:
export default function Model()
{
    const model = useLoader(
        GLTFLoader,
        './hamburger.glb',
        // ...
    )

    return <primitive object={ model.scene } scale={ 0.35 } />
}
GLTF loading with drei 38:42
It wasn’t that complicated, and yet, we had to do some twists and apply a bunch of techniques. But as always, there is an easier way thanks to drei.
Drei implements multiple loader helpers like useGLTF and useFBX.
In Model.jsx, import useGLTF from @react-three/drei:
import { useGLTF } from '@react-three/drei'Now replace the whole useLoader() call by useGLTF() with the path to the file as the only parameter:
export default function Model()
{
    const model = useGLTF('./hamburger.glb')

    // ...
}
And that’s it, we can remove the import of useLoader, GLTFLoader, and DRACOLoader.
You might wonder how can we handle the DRACO compressed version.
Easy, you don’t. useGLTF will take care of everything for us and we don’t even have to provide the DRACO decoder in the /public/ folder.
Try with the compressed model:
const model = useGLTF('./hamburger-draco.glb')
Preloading
Currently, our model will start loading only when the component is instantiated.
In our case, we’ve added the model directly to the Experience without any condition, so the model will start loading straight away. But if we had some conditions, such as the player who needs to enter the castle in order to instantiate the throne room or any interior decoration, then it would take a moment to load the throne and the user would see nothing but the placeholder for a moment (provided that we have a placeholder).
Maybe we are fine with that, but maybe we want to load the model as soon as possible to make sure it’s ready when the player arrives in the castle.
And we can do exactly that with the preload method on useGLTF.
This might sound a bit weird, but even if useGLTF is a function, it can have properties and methods (welcome to JavaScript).
In the Model.jsx file, after the Model function, call the preload with the model URL:
export default function Hamburger({ ...props })
{
    // ...
}

useGLTF.preload('./hamburger-draco.glb')
And that’s all. Even if it’s not relevant to our case, the hamburger will start loading immediately even if we don’t add <Model> in our JSX.
It’s important to use the exact same file path. If we are pre-loading the non-draco model and then start loading the draco model when the component is added, we loaded one for nothing and we will still have to wait for the second one to be loaded.
Multiple instances 46:05
As Pippin said: “What about the second breakfast?”
In our case, what if we want a second hamburger? Or three? Or a hundred?
Drei makes that possible with the Clone helper.
In Model.jsx, import Clone from @react-three/drei:
import { Clone, useGLTF } from '@react-three/drei'Replace the <primitive> by <Clone> with the same attributes:
<Clone object={ model.scene } scale={ 0.35 } />
We get the same result, but now we can create other clones very easily (don’t forget to use a fragment <><> since the component must return only one element):
export default function Model()
{
    // ...

    return <>
        <Clone object={ model.scene } scale={ 0.35 } position-x={ - 4 } />
        <Clone object={ model.scene } scale={ 0.35 } position-x={ 0 } />
        <Clone object={ model.scene } scale={ 0.35 } position-x={ 4 } />
    </>
}
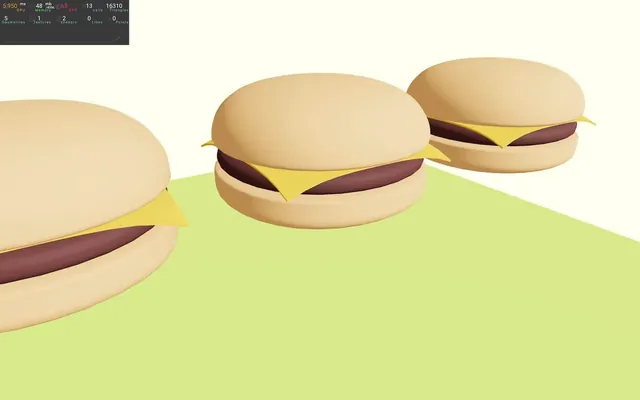
If you check the performance monitoring, you’ll see that the amount of geometries and shaders stays the same. Clone creates multiple meshes, it is still based on the same geometries and materials.
GLTF to component 48:53
If we want to manipulate the different parts of a hamburger, we need to traverse the loaded model, search for the right child, save it in some ways and apply whatever we need to it.
Another option would be to open it in a 3D software, change it and export it again.
None of those solutions are convenient.
Wouldn’t it be awesome to have our hamburger available as a component with everything inside a simple JSX that we can manipulate, however we want?
That’s what GLTF -> React Three Fiber does.
There is a command-line tool available here https://github.com/pmndrs/gltfjsx
And an online version available here https://gltf.pmnd.rs/
Let’s use the online version.
Converting our model
Drag and drop the hamburger file (draco or not) into https://gltf.pmnd.rs and it’ll convert your model into a component:
You can use the Debug UI to change some settings, and, as you can see, shadows are activated by default:
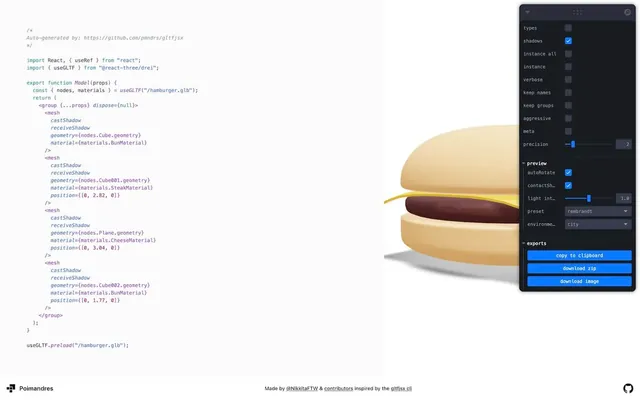
Let’s keep the default setting.
In /src/, create a Hamburger.jsx file and paste the code that GLTF -> React Three Fiber generated. You can use the buttons on the Debug UI to copy, but you can also download the file as a .zip. This file will contain a minimalist React project with everything you need in it.
/*
Auto-generated by: https://github.com/pmndrs/gltfjsx
*/

import React, { useRef } from "react";
import { useGLTF } from "@react-three/drei";

export function Model(props) {
  const { nodes, materials } = useGLTF("/hamburger.glb");
  return (
    <group {...props} dispose={null}>
      <mesh
        castShadow
        receiveShadow
        geometry={nodes.bottomBun.geometry}
        material={materials.BunMaterial}
      />
      <mesh
        castShadow
        receiveShadow
        geometry={nodes.meat.geometry}
        material={materials.SteakMaterial}
        position={[0, 2.82, 0]}
      />
      <mesh
        castShadow
        receiveShadow
        geometry={nodes.cheese.geometry}
        material={materials.CheeseMaterial}
        position={[0, 3.04, 0]}
      />
      <mesh
        castShadow
        receiveShadow
        geometry={nodes.topBun.geometry}
        material={materials.BunMaterial}
        position={[0, 1.77, 0]}
      />
    </group>
  );
}

useGLTF.preload("/hamburger.glb");
Refactoring
This component is almost ready to use, but we need to do some refactoring.
First, if you are a maniac like me, you can refactor the various line breaks, indents, semicolons, etc.
Next, the tool assumes that our model is available in the root directory (the /public/ folder), which is the case for us. But in other circumstances, make sure that the path in the useGLTF() and the useGLTF.preload() are the same.
Still, we can add the leading ./:
// ...

    const { nodes, materials } = useGLTF("./hamburger.glb");

// ...

useGLTF.preload("./hamburger.glb");
Then, this function is not being exported by default. It’s no big deal and we can still import it as Model, but let’s rename it to Hamburger and export it as default:
// ...

export default function Hamburger(props) {

// ...
Our component is ready.
Import
In Experience.jsx, import Hamburger from ./Hamburger.jsx:
import Hamburger from './Hamburger.jsx'And replace the <Model /> with it, while adding a scale:
export default function Experience()
{
    return <>

        {/* ... */}

        <Suspense fallback={ <Placeholder position-y={ 0.5 } scale={ [ 2, 3, 2 ] } /> }>
            <Hamburger scale={ 0.35 } />
        </Suspense>

    </>
}
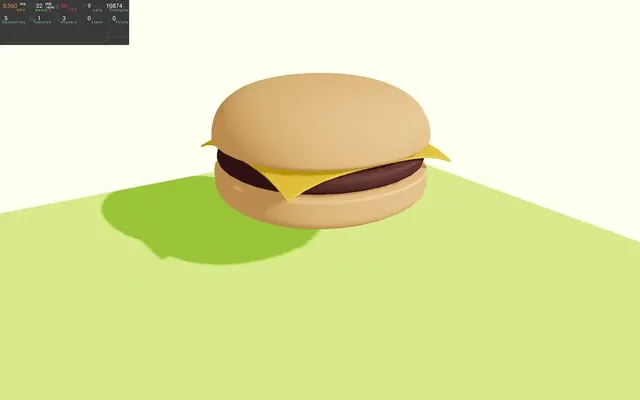
Now our hamburger’s back and with the shadows included as a bonus.
And since every part of the model are written as <mesh> and <group> in Hamburger.jsx, we have a lot more control over it.
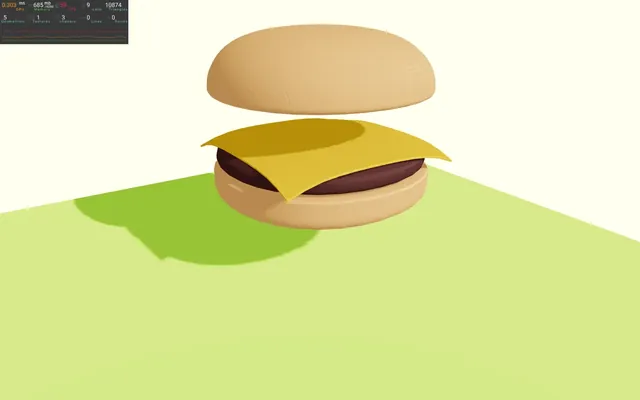
As an example, we can move the top bun by changing its position directly (the last Hamburger.jsx):
export default function Hamburger(props) {
  const { nodes, materials } = useGLTF("./hamburger.glb");
  return (
    <group {...props} dispose={null}>
      {/* ... */}
      <mesh
        castShadow
        receiveShadow
        geometry={nodes.topBun.geometry}
        material={materials.BunMaterial}
        position={[0, 3.77, 0]}
      />
    </group>
  );
}
Let’s put back the original position:
export default function Hamburger(props) {
  const { nodes, materials } = useGLTF("./hamburger.glb");
  return (
    <group {...props} dispose={null}>
      {/* ... */}
      <mesh
        castShadow
        receiveShadow
        geometry={nodes.topBun.geometry}
        material={materials.BunMaterial}
        position={[0, 1.77, 0]}
      />
    </group>
  );
}
Fixing the shadow
The shadows look a bit weird with stripes crossing the surface of the hamburger.
As discussed in previous lessons, this is called shadow acne and it’s due to the model casting shadows on itself.
We can fix this issue by tweaking the bias or shadowBias on the directional light shadow in Experience.jsx:
<directionalLight castShadow position={ [ 1, 2, 3 ] } intensity={ 4.5 } shadow-normalBias={ 0.04 } />
Animation 01:02:52
The last topic we need to talk about is animation.
We are going to use the usual animated Fox provided by the Kronos Group in the glTF-Sample-Models GitHub repository.
The Fox files are already located in the /public/Fox/ folder.
We are going to create a Fox component, load any of the model variations available in the /public/Fox/ folder with useGLTF and add it to the scene.
Now would be a good opportunity to try it yourself.
Let’s do it together.
Component
In the /src/ folder, create a Fox.jsx file.
In that file add and export as default a component function named Fox:
export default function Fox()
{
    return null
}
Back to Experience.jsx, import Fox:
import Fox from './Fox.jsx'And add it to the scene:
export default function Experience()
{
    return <>

        {/* ... */}

        <Fox />

    </>
}
Load the model
In Fox.jsx, import useGLTF from @react-three/drei:
import { useGLTF } from '@react-three/drei'In the Fox function, load the model with useGLTF and name the variable fox:
export default function Fox()
{
    const fox = useGLTF('./Fox/glTF/Fox.gltf')

    return null
}
Now return a <primitive> with its object attribute set to fox.scene:
import { useGLTF } from '@react-three/drei'

export default function Fox()
{
    const fox = useGLTF('./Fox/glTF/Fox.gltf')

    return <primitive object={ fox.scene } />
}
The Fox is way too big.
Use the various attributes like scale, position and rotation to move it in front of the hamburger:
<primitive
    object={ fox.scene }
    scale={ 0.02 }
    position={ [ - 2.5, 0, 2.5 ] }
    rotation-y={ 0.3 }
/>

Play the animation
Great, we have our fox, but how do we animate it?
You probably guess it, but there is a drei helper named useAnimations for that.
Import useAnimations from @react-three/drei:
import { useAnimations, useGLTF } from '@react-three/drei'If you remember from the previous lessons, when loading a GLTF file, we get access to various information in the object (fox in our case):
export default function Fox()
{
    const fox = useGLTF('./Fox/glTF/Fox.gltf')
    console.log(fox)

    // ...
}
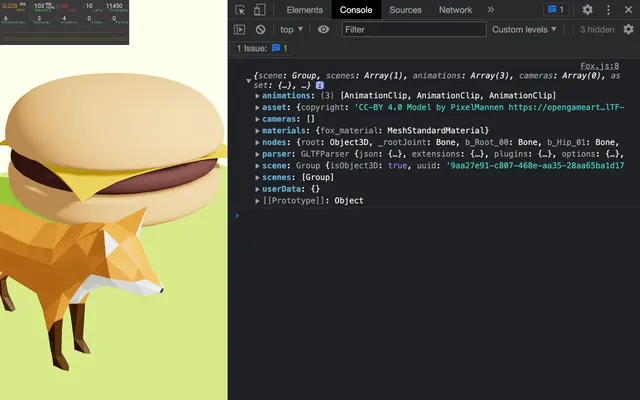
Currently, we are already using the fox.scene in our <primitive>, but we also have access to the animations that come with the model in fox.animations.
And those are the two elements we need to provide to useAnimations.
After calling useGLTF, call useAnimation and send it fox.animations and fox.scene:
export default function Fox()
{
    const fox = useGLTF('./Fox/glTF/Fox.gltf')
    const animations = useAnimations(fox.animations, fox.scene)
    console.log(animations)

    // ...
}
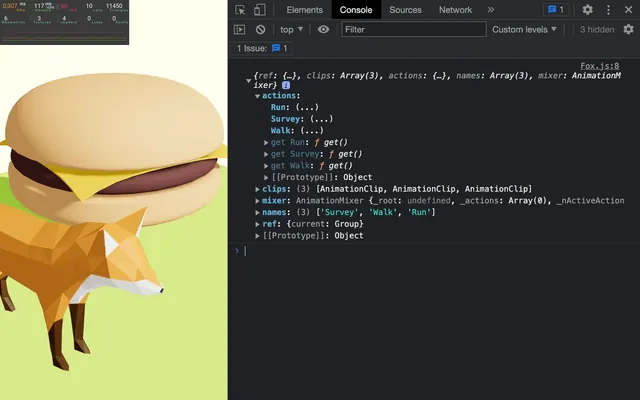
We now have access to the various animations provided with the model and each one has been converted into an AnimationAction using the name of the animation (Run, Survey and Walk in the case of the Fox) and those actions are available in the animation.actions object.
But before starting any of those actions, it’s better to do it once the component as finished rendering for the first time and we can do that using useEffect.
Import useEffect from react:
import { useEffect } from 'react'Call it in Fox, send it a function and an empty array as dependencies:
export default function Fox()
{
    // ...

    useEffect(() =>
    {

    }, [])

    // ...
}
And here, we can choose an animation we want to play from the actions property:
export default function Fox()
{
    // ...

    useEffect(() =>
    {
        const action = animations.actions.Run
    }, [])

    // ...
}
And play it:
export default function Fox()
{
    // ...

    useEffect(() =>
    {
        const action = animations.actions.Run
        action.play()
    }, [])

    // ...
}
React Three Fiber and the useAnimations helper will take care of updating the animation on each frame.
If you want the fox to start walking after a few seconds, you can use the various methods available in AnimationAction like crossFadeFrom which is going to fadeOut the Run and fadeIn the Walk:
useEffect(() =>
{
    animations.actions.Run.play()

    window.setTimeout(() =>
    {
        animations.actions.Walk.play()
        animations.actions.Walk.crossFadeFrom(animations.actions.Run, 1)
    }, 2000)
}, [])
Animation control and cleanup phase
We are going to push that animation topic even further by letting the user choose the animation using Leva and fade the incoming animation so that we don’t get a brutal change.
First, we must add Leva to the project.
In the terminal, install leva with npm install leva@0.9.34 (we force the version to prevent surprises, you can ignore potential vulnerability warnings).
In Fox.jsx, import useControls from leva:
import { useControls } from 'leva'In the Fox function, after the useAnimations, call useControls to create a tweak with a <select> where the choices are the available animations in the model.
Now would be a good time to try on your own.
Here’s the solution with the result of the tweak named animationName:
export default function Fox()
{
    const fox = useGLTF('./Fox/glTF/Fox.gltf')
    const animations = useAnimations(fox.animations, fox.scene)

    const { animationName } = useControls({
        animationName: { options: animations.names }
    })

    // ...
}
In the useEffect, instead of using the Run animation, we can use the animationName variable:
useEffect(() =>
{
const action = animations.actions[animationName]
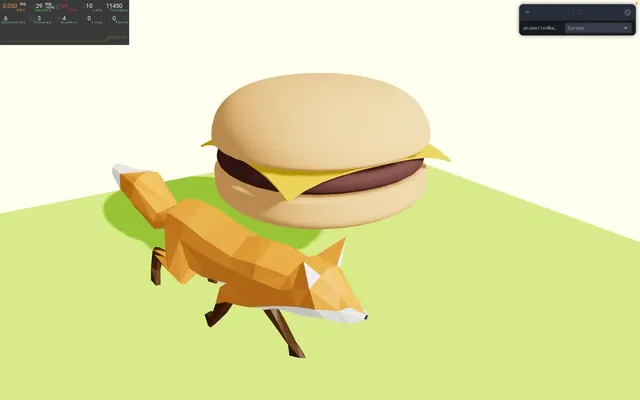
action.play()
}, [])The fox model is now playing the Survey animation because it’s the first one in the list of choices.
Now, we want to play a different animation when the user changes the animationName tweak.
Currently, the useEffect dependencies array is empty, meaning that the function will only be called once after the first render. This is exactly where setting a specific dependency gets useful. We want the function to be called on the first render but also when the animationName changes.
Add the animationName to the dependencies array:
useEffect(() =>
{
    // ...
}, [ animationName ])
And add a console.log if you want to check how the function is being called:
useEffect(() =>
{
    console.log('animationName', animationName)

    // ...
}, [ animationName ])
The function is being called when we change the animationName, but the animation of the fox looks weird after we change it to the second animation and weirder if we change it to third animation.
The reason is that all animations are playing together and Three.js will mix them. First, you are seeing the Survey animation; then a mix of the Survey and the Walk animations; and finally a mix of the Survey, the Walk and the Run animations.
To fix that, we need to stop the old animation progressively (fadeOut) and start the new animation progressively (fadeIn).
First, remove the console.log.
Then, instead of just calling play(), we are going to fade it in first by adding fadeIn before the play with a value of 0.5 (the duration of the fadeIn in seconds):
useEffect(() =>
{
    const action = animations.actions[animationName]
    action.fadeIn(0.5).play()
}, [ animationName ])
Now, we need a way to fade out the old animation.
If you remember from the previous lessons, when you return a function in useEffect, that function will be called when the component is being disposed of or just re-rendered:
useEffect(() =>
{
    const action = animations.actions[animationName]
    action.fadeIn(0.5).play()

    return () =>
    {
        console.log('dispose')
    }
}, [ animationName ])
This is the perfect opportunity to fade out the currently playing animation that we saved in the action variable.
In React, we call this the cleanup phase. It’s where we make sure to dispose of what needs to be disposed of.
And since it’s inside the function where we created the action variable, we can call fadeOut on it with 0.5 as the duration:
useEffect(() =>
{
    // ...

    return () =>
    {
        action.fadeOut(0.5)
    }
}, [ animationName ])
And that’s it. The fox animations are cross fading properly.
For some reasons, going back to an animation that faded out won’t work and we need to reset it.
Although it’s not relevant in the case of the fox animations, reseting the animation will also make it start from the beginning.
You can do that by calling the reset method right before the fadeIn:
useEffect(() =>
{
    const action = animations.actions[animationName]
    action
        .reset()
        .fadeIn(0.5)
        .play()

    // ...
}, [ animationName ])
No big difference in this case, but you might need that for more specific animations.
In the next lessons, we will have opportunities to load models.